Iwantmyname servermx MX DNS setup
Iwantmyname MX setup
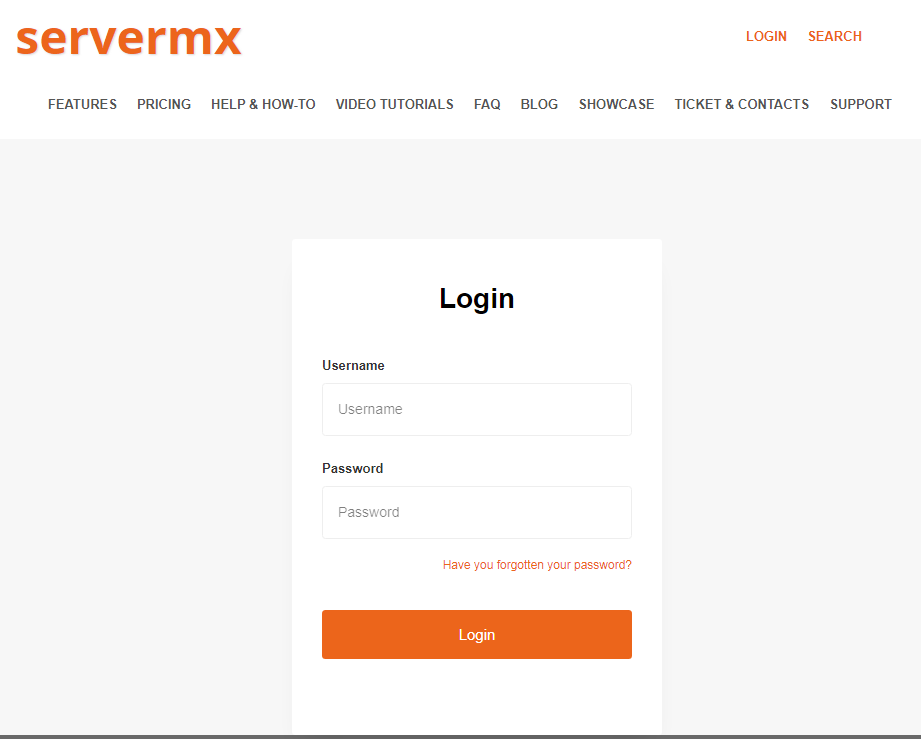
1) Login at servermx.com
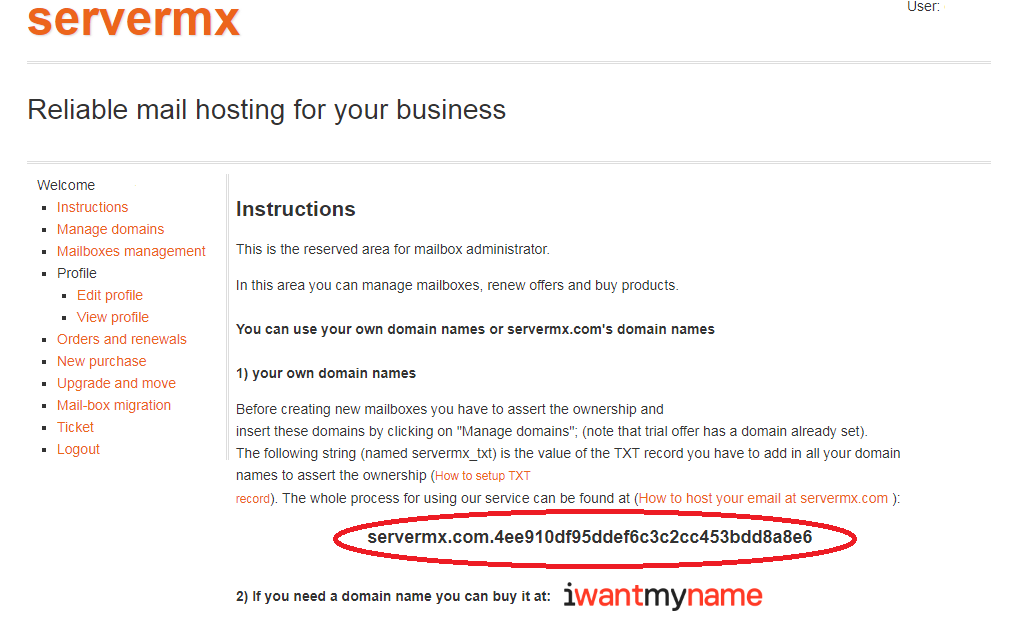
2) Copy your verification code
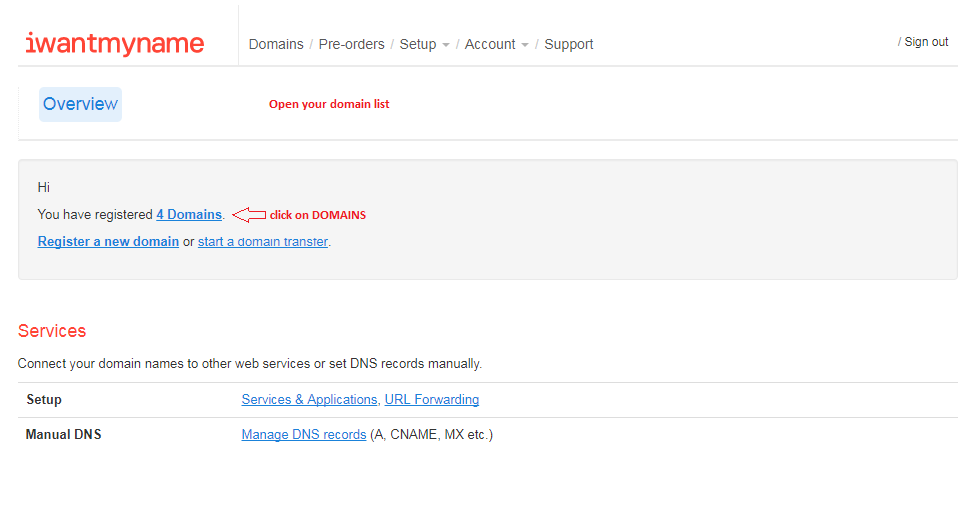
3) Login at iwantmyname
4) Click to open the domain list
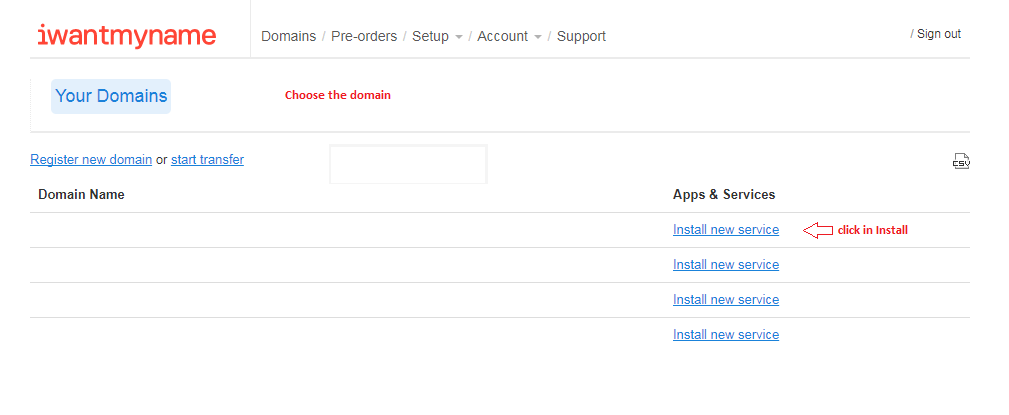
5) Click on "Install new service"
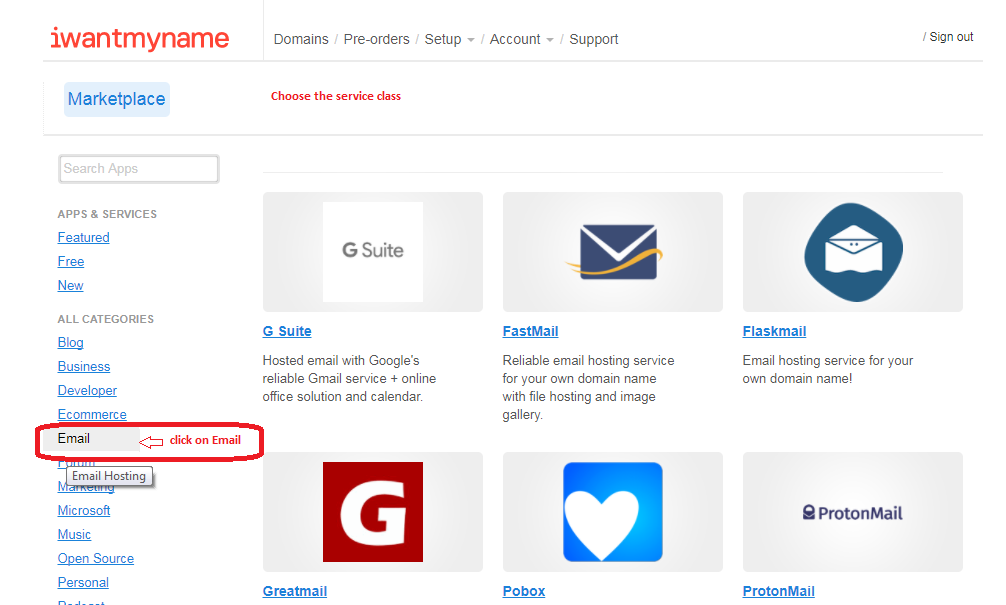
6) Click to choose email services apps
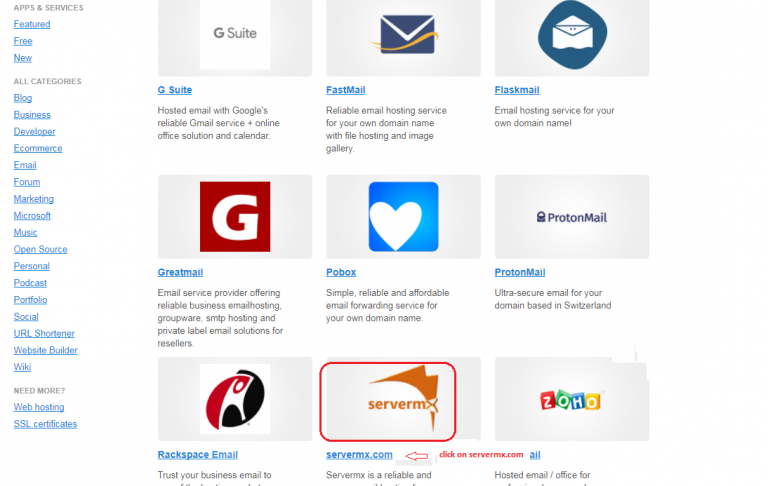
7) Click to choose servermx.com
8) Paste the verification code (e.g. : servermx.com.34c0785db762b4ab1260bedf238e883a) you copied (see step 2) in the field "Servermx verification code" and click on "Install servermx.com"
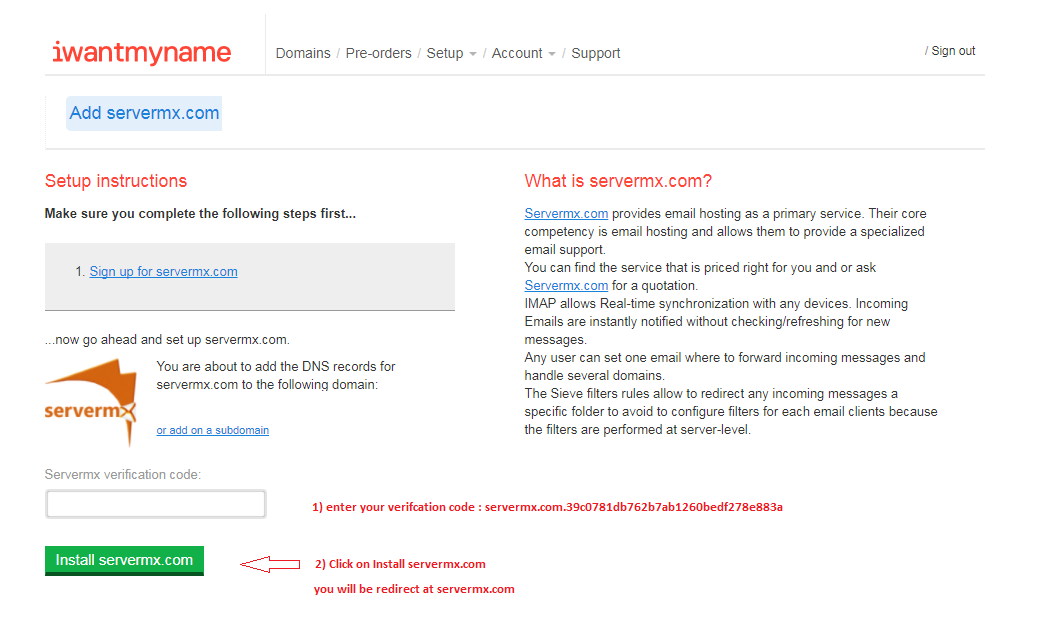
At this point, you will be redirected to servermx.com.
All the DNS settings will be performed by iwantmyname.